
Having the right kind of tools in your toolbox can make any job easier. You wouldn’t try to clear a clogged toilet with your hand, you’d use a plunger. It would be messy to boil pasta in a skillet so you use a deep pot with lots of water.
It also helps to have the right tools to control paper clutter!
Over the years I’ve figured out what tools work for me to help keep the paper piles from becoming mountains. In this three part blog series I’ll show what I use. It ranges from a timer (my favorite tool) to desk organizers, different color file folders, and containers to hold all those files. You probably already have some of these tools but you may not be using them in the best way. For me, a tool has to help eliminate the excuses that lead to procrastination.
Using a Timer
I learned long ago that a timer is the best tool in my toolbox. My tendency to overestimate how much time a certain task takes usually creates a lot of procrastination. It’s not an uncommon problem for many people. I’m not sure why this happens, but I guess it’s because the tasks aren’t fun, therefore excuses pop up quickly to avoid doing them. With the proper tools and systems in place it’s hard to justify any excuses.

I set my timer to do all kinds of things. It turns a boring task into a game. Beat the timer becomes a challenge.
- Clean the piles on my desk – 15 minutes
- Pay bills – 30 minutes
- File papers – 15 minutes
- Work on priority papers that need a response – 30 minutes
- phone calls
- forms filled out and/or signed
- email response to an issue or project
I also use the timer to control the time I spend on Social Media. It’s so easy to lose track of time that way!
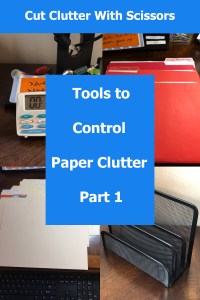
The above timer is what I use at my desk. It’s lasted for years. You can use the timer on your phone but I like this kind of timer because I can preset 3 different times. I set them for 30 minutes, 15 minutes, and 5 minutes.
Corralling Bills and Receipts
It’s so easy to put all the bills and receipts in a pile on the desk or counter. Before you know it the bills are lost in the large pile and are in danger of being paid late. Not only does that mess up your credit, it also cost you more money in late fees.
To avoid misplaced bills and receipts I use a very simple desk mail organizer. I put all my receipts in an envelope that sits in the front slot. When I get ready to pay a charge card bill I pull the receipts out to match them up with the charges.

![]()
When a bill comes in the mail I put it in the second slot. Each week it’s easy to check the bills to see which ones are due. This helps prevent lost bills or overdue bills.
I receive a few bills through email that are not set up for autopay. Since I’m a visual person I have this fear I’ll forget to pay those bills on time. So I’ll put the basic information (Name, due date, amount) on a piece of paper then put that in the second slot of the organizer with the rest of the bills.
Project Papers
Many of the papers that accumulate on our desks are ones that need some kind of action taken on them. Maybe a simple phone call is all that is needed. Or some forms need to be signed and sent back to a doctor, business, or school. It could be papers that deal with a home repair or remodeling project. Whatever those papers are related to, it’s important to keep them organized.
The best tool to organize all those papers is file folders. One folder is a “Priority Folder”. This is for those mini but important projects that only require one small action to complete. Usually that action only takes a few minutes but it time sensitive.
The projects that have more papers/info and require more than one simple action will get a file folder of their own. Any time a new paper comes in or an action is taken, I can easily put that info in the folder so it doesn’t get piled up on the desk somewhere. I usually keep a log sheet (a lined piece of paper) in each project folder to help me keep track of the date each action taken. I also list the “next” action that needs to be done. In other words, I create a little road-map of where I’ve been and where I’m going.
The project folders for ongoing projects are put in color folders. I use red ones for the Priority Folder, Taxes (for estimated and yearly tax papers), and Paperwork/Bills. These folders are checked at least weekly to make sure everything is up to date on them.

Ongoing and Temporary Project Folders
I use blue folders for all my ongoing work projects. These are my Weekly Newsletter, Blog posts, Website Improvement/maintenance, and Social Media actions. All of the red and blue folders have permanent labels written on them.


The temporary/one time project folders are in the plain file folders. Those folders are put in hanging file folders for the category they are related to; work, financial, home improvement/maintenance, health, etc. Since these are temporary projects I will file/shred/scan the papers from the folder when the project is complete. Then I reuse the folder for the next project. To help with the labeling issue I use removable labels each time I change the project. It’s a simple tool that lets me save money by not replacing the folders until they are well worn.
In Part 2 of this blog series I’ll show you how I keep all those folders organized so the folders themselves don’t become a cluttered mess.
Conclusion
The tools I’ve showed you help me keep the paper piles from building up. However, as I have always said, the most important thing is for you to find tools and systems that work for you. Eliminate the excuses that you don’t have time or don’t know where to put the papers. Once you fill your toolbox with the right tools, you’ll soon become proficient in minimizing those paper piles.
To a lighter load along the way.
Janice Scissors